I’ve been asked a few questions about the
buildings that I used for the Day 2 ATZ encounter (http://wargamersparadise.blogspot.com.au/2017/11/generation-zed-day-2.html)
and in particular what were the houses that I used.
I use paper models from Dave Graffam
Models. I like these because they’re not too big and don’t take up too much
space on the table and they are scaled for 28mm in terms of the doors and
window.
Also the majority of the models (probably
all the new ones) come with interiors.
Whilst they aren’t big enough to put
detailed furniture inside them they are big enough to put the figures in and to
position them up against the windows etc (the placement of windows and doors on
the inside of the model matches the outside of the model).
I originally made all the houses to suit my
European WW2 table and we’ve had many sessions enjoying the kind of rustic
rural scene that they create when they are put together with my dirt and cobble
roads, rural signs, livestock, fences and trees etc which all match that period
and place.
I buy them from rpgnow and most of them are
about $3-5 USD depending on which model is chosen. A bargain, I think, given
their quality and that they mostly have multiple skins meaning that you have
quite a variety of houses for each file (you could probably do half a dozen
fairly distinct buildings per file).
The first one I thought I would show is The
Cabin. This was the first building I built and it’s the simplest.
As you can see from the next couple of
pictures, it is a fairly small model, but it is well scaled to match 28mm
miniatures (sorry the pictures are a bit yellow but I had to take these almost
in the dark before I flew out this yesterday morning).


It’s a nice simple
design and it’s got a suitable interior as well.

I’ve used a
variety of materials over the years for making the models but the best I’ve
found for durability and ease of making them is foam core cardboard. It doesn’t
warp, is light weight and it easy to cut. For smaller elements (like chimneys)
I use manila folders that you find in any office. I usually try to build
buildings that have something on the roof just to break up the model a bit.
Here is the
official picture of the model.

These are the different
texture options that you get with the model:
- Stone walls,
- Wood walls,
- Stone corners,
- Stone foundation,
- Brick walls (3 styles),
- Plaster walls (2 styles),
- Beams (3 styles),
- Many window and door positions,
- 4 types of roofs,
- 3 types of floors,
- Optional floor rugs,
- 2 chimney positions,
- Optional 1" grid overlay.
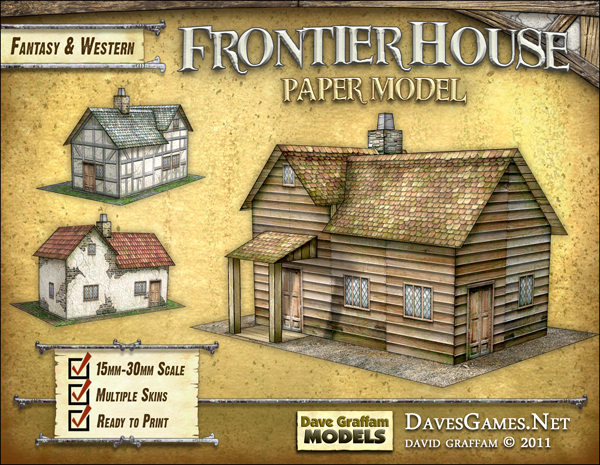
The next one is
the Frontier House. I like this model because it has a 2 part roof structure
and it has a small second storey (which is great for housing a MG in WW2).

The interiors are
done up to match the exteriors.


And with one roof
on.

I learnt after a
while that if I make simple braces for the roof that it’ll sit a lot better on
the model and keep its shape better. All the roofs are mode of manila folder whereas
the walls, floors and bracing are all foam core.

And the official
picture.
So I hope these
give you some good ideas about paper terrain. It’s easy (easier than you think),
quick (much, much quicker than trying to build and paint) and cheaper than you
think and it looks good (often better than model terrain).
DEW
A very informative post, Tim. I must say that I like the Dave Graffam range of card models as well. I have quite a few myself, including these two. Sadly, I haven't made them yet.
ReplyDeleteThanks Bryan. I think one of the things that I really like the size of them as they don't crowd out the table.
DeleteThe little out buildings are a cracker too for providing a lot of smallish terrain on the table. I might do a post on them soon.
I went back through the models the other day and realised that they don't always come with insides but that I just made my own by printing another set of walls and a floor and gluing that to the inside.
Seems to have worked ok.
I 've often looked at Daves models, but never quite takenthe plunge,but yours do look good (mine would look not so good)
ReplyDeleteHahaha you are too harsh on yourself Joe. I've seen plenty of your stuff and it's pretty darn good.
DeleteMine got a lot better when I went over to foam core from card board and also, after a while, I worked out that a really sharp knife helped a lot.
On some of the later models I built I started to paint the joints black before I glued them. Sometimes I've gone back and done this post construction. It just removes that very bright, very obvious white join to the models.
For the very latest models I built I used black foam core. A bit more expensive but very worth it.
Thanks for this post Tim, you've convinced me that I need to re-visit the Dave Graffam buildings, though from your build quality you obviously have far fewer thumbs than I do ;-)
ReplyDeleteYou've done a great job on them, and European WW2 to post apocalypse America just proves their versatility!
Yeah there are a couple more tips I should probably give about how to cut the foam core.
ReplyDeleteWhen I'm home next (about a couple of weeks away, this is a bit of a long deployment) I might build another building and take some photo's as I'm going.
That way I can show how I get all the joins properly cut out etc.
It's been a while since I built one but in the last batch I knocked out 3 or 4 in one sitting because I'd gotten rather quick with it but it did take a little while to get some of the initial techniques sorted (like how to cut the foam core properly, bracing the roofs, printing the interiors etc).
These look awesome! Do you print the images on regular paper or on cardstock? I've been using cardstock, but I find that over time the adhesive cannot support the cardstock on the foam board and it begins peeling.
ReplyDeleteThanks!
Hi Trevor, just on regular paper mate. I haven't had any trouble with the paper coming off the foam board on the outside, just a little on one bit on the inside, which I should get off my butt and glue back with just a dab of something.
DeleteI use normal kids stick glue that they use in school for projects. Nothing fancy.
I cannot do anything this weekend but next weekend I might make another building and I'll take some photo's of how I do it.
It's been a while since I've done it (probably about 3 or 4 years I guess) so it'll be a bit of a reminder for me but it should be good. See if I can remember a couple of the little tricks that I used to use.
It shows you how long they hold up though if you properly store them.
Awesome, thank you for the tips! I'm looking forward to seeing more of your content!
ReplyDeleteThanks Trevor. Just knocked up a tutorial. Hopefully that's of interest.
Delete